With all of the gardens beginning to grow now that nice weather has finally arrived, the students in our Full Day Kindergarten class are excited about plants, both flowers and food. One of the children brought in pictures of her family’s food garden and showed it around the classroom. My teaching partner and I decided to change our dramatic play centre to a grocery store to capitalize on the students interest in the picture and how food grows.
We gathered all of the plastic food, made store signs, printed labels for shelving and went to the library to find books on the food groups. We also made up sheets for the students to print, or draw, their own grocery lists, as well as their own receipts. We set up after school, and today, we made a big “production” of opening our store. The children loved it!
In continuation with our beautiful stuff project, the children used real wood piece to create home, buildings, bridges and other various structures. The children created, draw their designs, labelled some parts, glued and painted their designs. It was a great and fun experience.
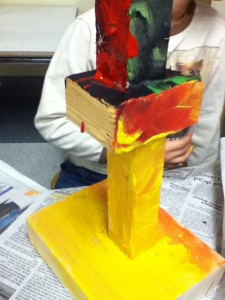
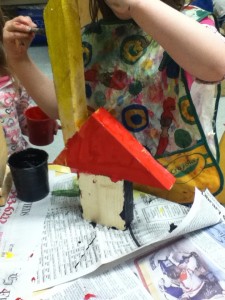
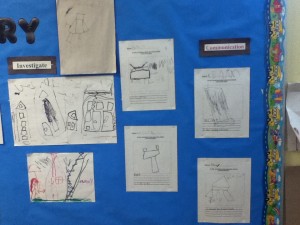
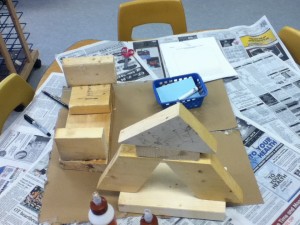
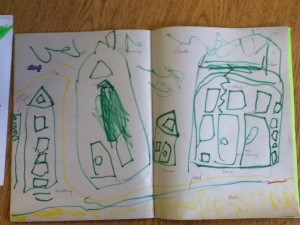 This student independently drew a picture of his neighbourhood when we were writing in our journals. He carefully selected shapes that are parts of a building, told me about the buildings-some stores and houses and added stairs that go to the bed on the top floor (blueprints show stairs!).
The children have shown an interest in learning about dinosaurs so my ECE partner and I decided to enhance the idea by making an attractive centre. We used table cloths for water and land, we added wood pieces for children to do as they wish, and dinosaurs. Children brought over the books that illustrated where they lived, some wrote the dinosaur names referenced in the books and I displayed their writing next to the table, and words that describe some new knowledge about dinosaurs are also posted. The display is on our sandbox table which we decided to switch over for the week. Simple, easy, and has sparked some new learning on the topic!
Next we will change the sandbox into a Paleontologist work site. We have bones from a left over turkey, some brushes, name tags and some fun dinosaur hats they can wear to begin their research in the sand!
Over the last while I have engaged in some professional reading around the Reggio classroom. Some of the main ideas is to encourage independent learning, bringing nature and calmness into the environment, and focusing on inquiry in multiple areas of the room.
Creating an environment that will encourage investigation and inspire your students to be researchers begins with displaying materials that children can touch, triggers their interest (possibly with some discussions in large group), and placing items that are reflective (like mirrors) and the use of light in different ways (light tables, overhead projectors, lamps, wall of lights).
Once we engage the learner we can begin listen to the conversations, ask questions and begin researching.
As children explore, educators can begin the documentation process. Below are a variety of pictures that display centre ideas that can be incorporated into the classroom. Items are displayed in a way that will attract attention, use different surfaces to change the dimension of the classroom, and will certainly lead into questioning.
Here there are 3 activities. One is the 3 glass containers with items in them and containers below. Students see this and it may lead to sorting. The second display is highlighters with coloured paper which may encourage some reluctant writers to experiment with colours and see the variety of paper too! Next is the overhead projector with bottles of coloured water and different materials inside plastic water bottles. Children can display them on the wall, in the block centre or elsewhere in the room. This can lead to an inquiry on light, colour, shapes etc.
This s a creative way to display materials and let children decide how to use the display.
Here are some natural materials found in the environment that can be displayed at a table in a science area. The materials are neatly organized to invite the students to explore. You can add paper and pencils to allow the children to draw what they see and this can spark an inquiry about nature-trees, rocks etc. You can talk about diagrams and bring in some non-fiction books about the topic that can be displayed along side the table.
Another idea to display rocks, gems, found materials onto a lazy susan. This activity can be tied into math for sorting, graphing, counting, 1 to 1. Or an abstract art glueless mosaic activity can come from this. To the centre you can again add paper to allow the children to draw their creations and display them. You may begin an inquiry into colour…..
Strategically placing materials in the room that are neatly displayed will engage the learner into perhaps trying new things and asking questions which can lead to many inquiry projects and meet many curriculum expectations.
On Monday, I brought an ice cube tray to work. I put small winter animals in the tray and added water. Yesterday, I took the animal ice cubes and added them to our water table.
To introduce the activity, we played “What Sinks/What Floats”. I also asked who thought the ice cubes would melt before we went home at the end of the day, and who thought they would melt when we returned to the school the next day. I made a quick graph on one of our white boards. In our room, each child has a magnet with their name on it so making a graph is simple and quick and is also interactive for the children.
I then left the ice cubes in the water table for the children to play with throughout the day. They loved seeing the tiny animals inside.
Before we got dressed to go home, we all gathered around the water table to see if the ice cubes had melted. They had. We did a quick review of the graph before going to the coatroom to get ready. I will leave the animals in the water table for tomorrow.
A fun way to teach children how primary colours mix to create other colours is by painting snow.
I went to the dollar store and bought 6 spray bottles. I took them to our class and we mixed small amounts of tempera paint, dish or laundry soap and water in them. This allows the mixture to be washable, should any of it get on the children’s clothing. We used only the primary colours (red, yellow and blue). I took small groups of children (6 at a time), had them dress in their winter clothing and then we ventured out to our school yard to paint the snow.
At first, I got them to take turns spraying only the colours I said, and where I said. This gave them a demonstration of how to mix the colours and see what happens in a more controlled setting. For example, first I asked the children with blue to spray a circle of blue on small spot of the white now. Then, I asked the children with yellow to spray directly on the blue spots. It only took moments for the snow to turn from blue to green. The children’s eyes grew large in wonder! I then allowed them to create their own colours, and asked them to tell me what they saw happening.
The children had a ton of fun creating colours and playing in the snow!
I came a cross a great idea using found materials. You can collect and gather a variety of recycled objects from around your home or ask your students to bring in materials, but I just focused on collecting lids. I have collected various sizes, colours, and shapes. From the dollar store I purchased a large, shallow tray to gather all the objects and some circular cork boards for children to arrange their materials on. Choose a space in your room to house the materials or display them on a table–tray in the middle and cork boards around to create an inviting space. Allow children to create designs based on colour, shapes or other attributes and see where the discussion may go….
Picture to follow shortly….


Recent Comments